Follow these steps to set up a fully customized opt-in popup directly from your Pushloop app in Shopify:
1. Access the Opt-in Section
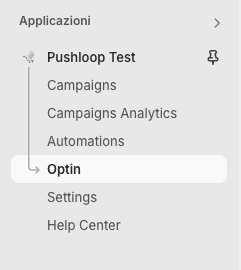
From the app menu, go to:
Applications > Pushloop Test > Optin
2. Manage the Custom Popup

Click “Manage” under the Custom Popup section.
This will open the customization panel where you can design your opt-in popup.
3. Customize Your Popup
Here’s how to fill in each field:
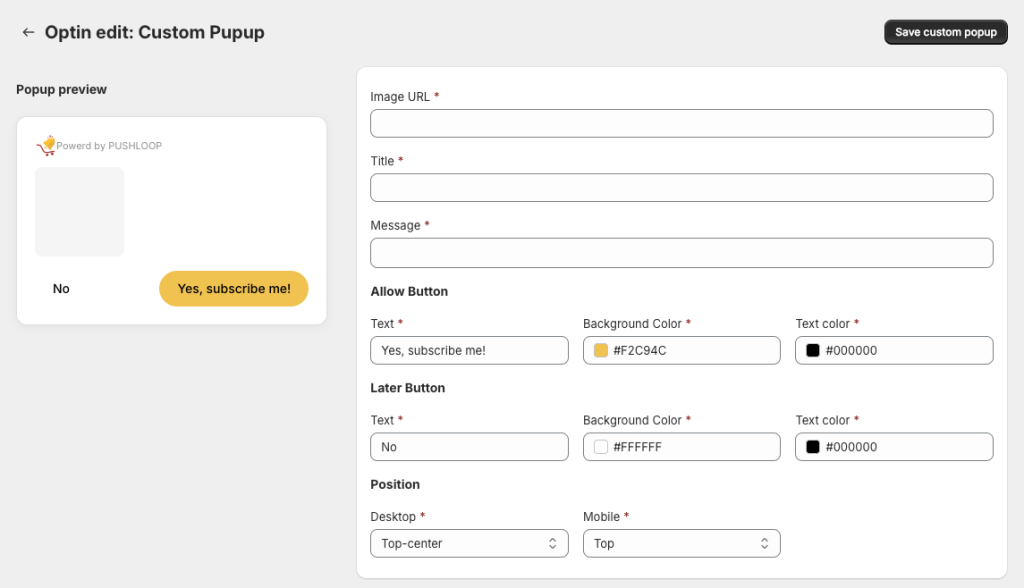
- Image URL: Add a direct link to the image you want to display in the popup — it can be your logo or a welcoming graphic that represents your brand.
- Title: Add a catchy and relevant title for your popup.
- Message: This is the main message your visitors will see. Keep it short and clear — use it to explain the benefits of subscribing.
4. Configure Buttons
You can fully personalize both buttons:
- Allow Button (e.g. “Yes, subscribe me!”)
- Later Button (e.g. “Later” or “No, thanks”)
For each button, you can:
- Edit the text
- Choose the background color
- Set the text color
This allows you to align the popup’s design with your store’s visual identity.
5. Set Popup Position
Choose where the popup will appear on your site:
- Desktop: top-left, top-center, top-right, bottom-left, bottom-center, or bottom-right
- Mobile: top or bottom
Select the position that best fits your layout and doesn’t interfere with important page content.
6. Save and Activate
- Click the “Save custom popup” button (top right)
A confirmation message will appear: “Custom Popup updated successfully”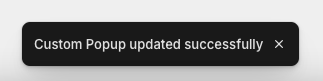
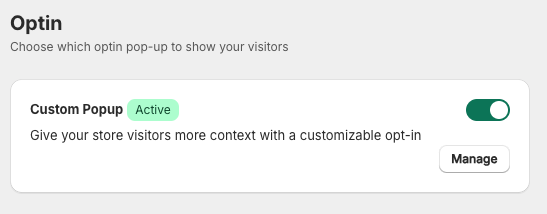
- Return to the main Optin page (click the back arrow next to “Optin edit: Custom Popup”)
- Toggle the switch to activate your popup
You’ll see the label “Active” appear next to “Custom Popup” for confirmation.
You’re all set! Your new popup will now appear to visitors according to the position and style you configured.